Happhygreenz – Tower Assembly Guide
Happhygreenz tower assembly

NeoX 40 Tower Assembly Guide

Follow these five simple steps to assemble your Happhygreenz NeoX tower with a 60 L tank, from pump placement to crown and net pots.

Happhygreenz NeoX 40 hydroponic system components including pump, tank, cover, bottom, pipes, sections, crown, netpot, connector and screw.
1
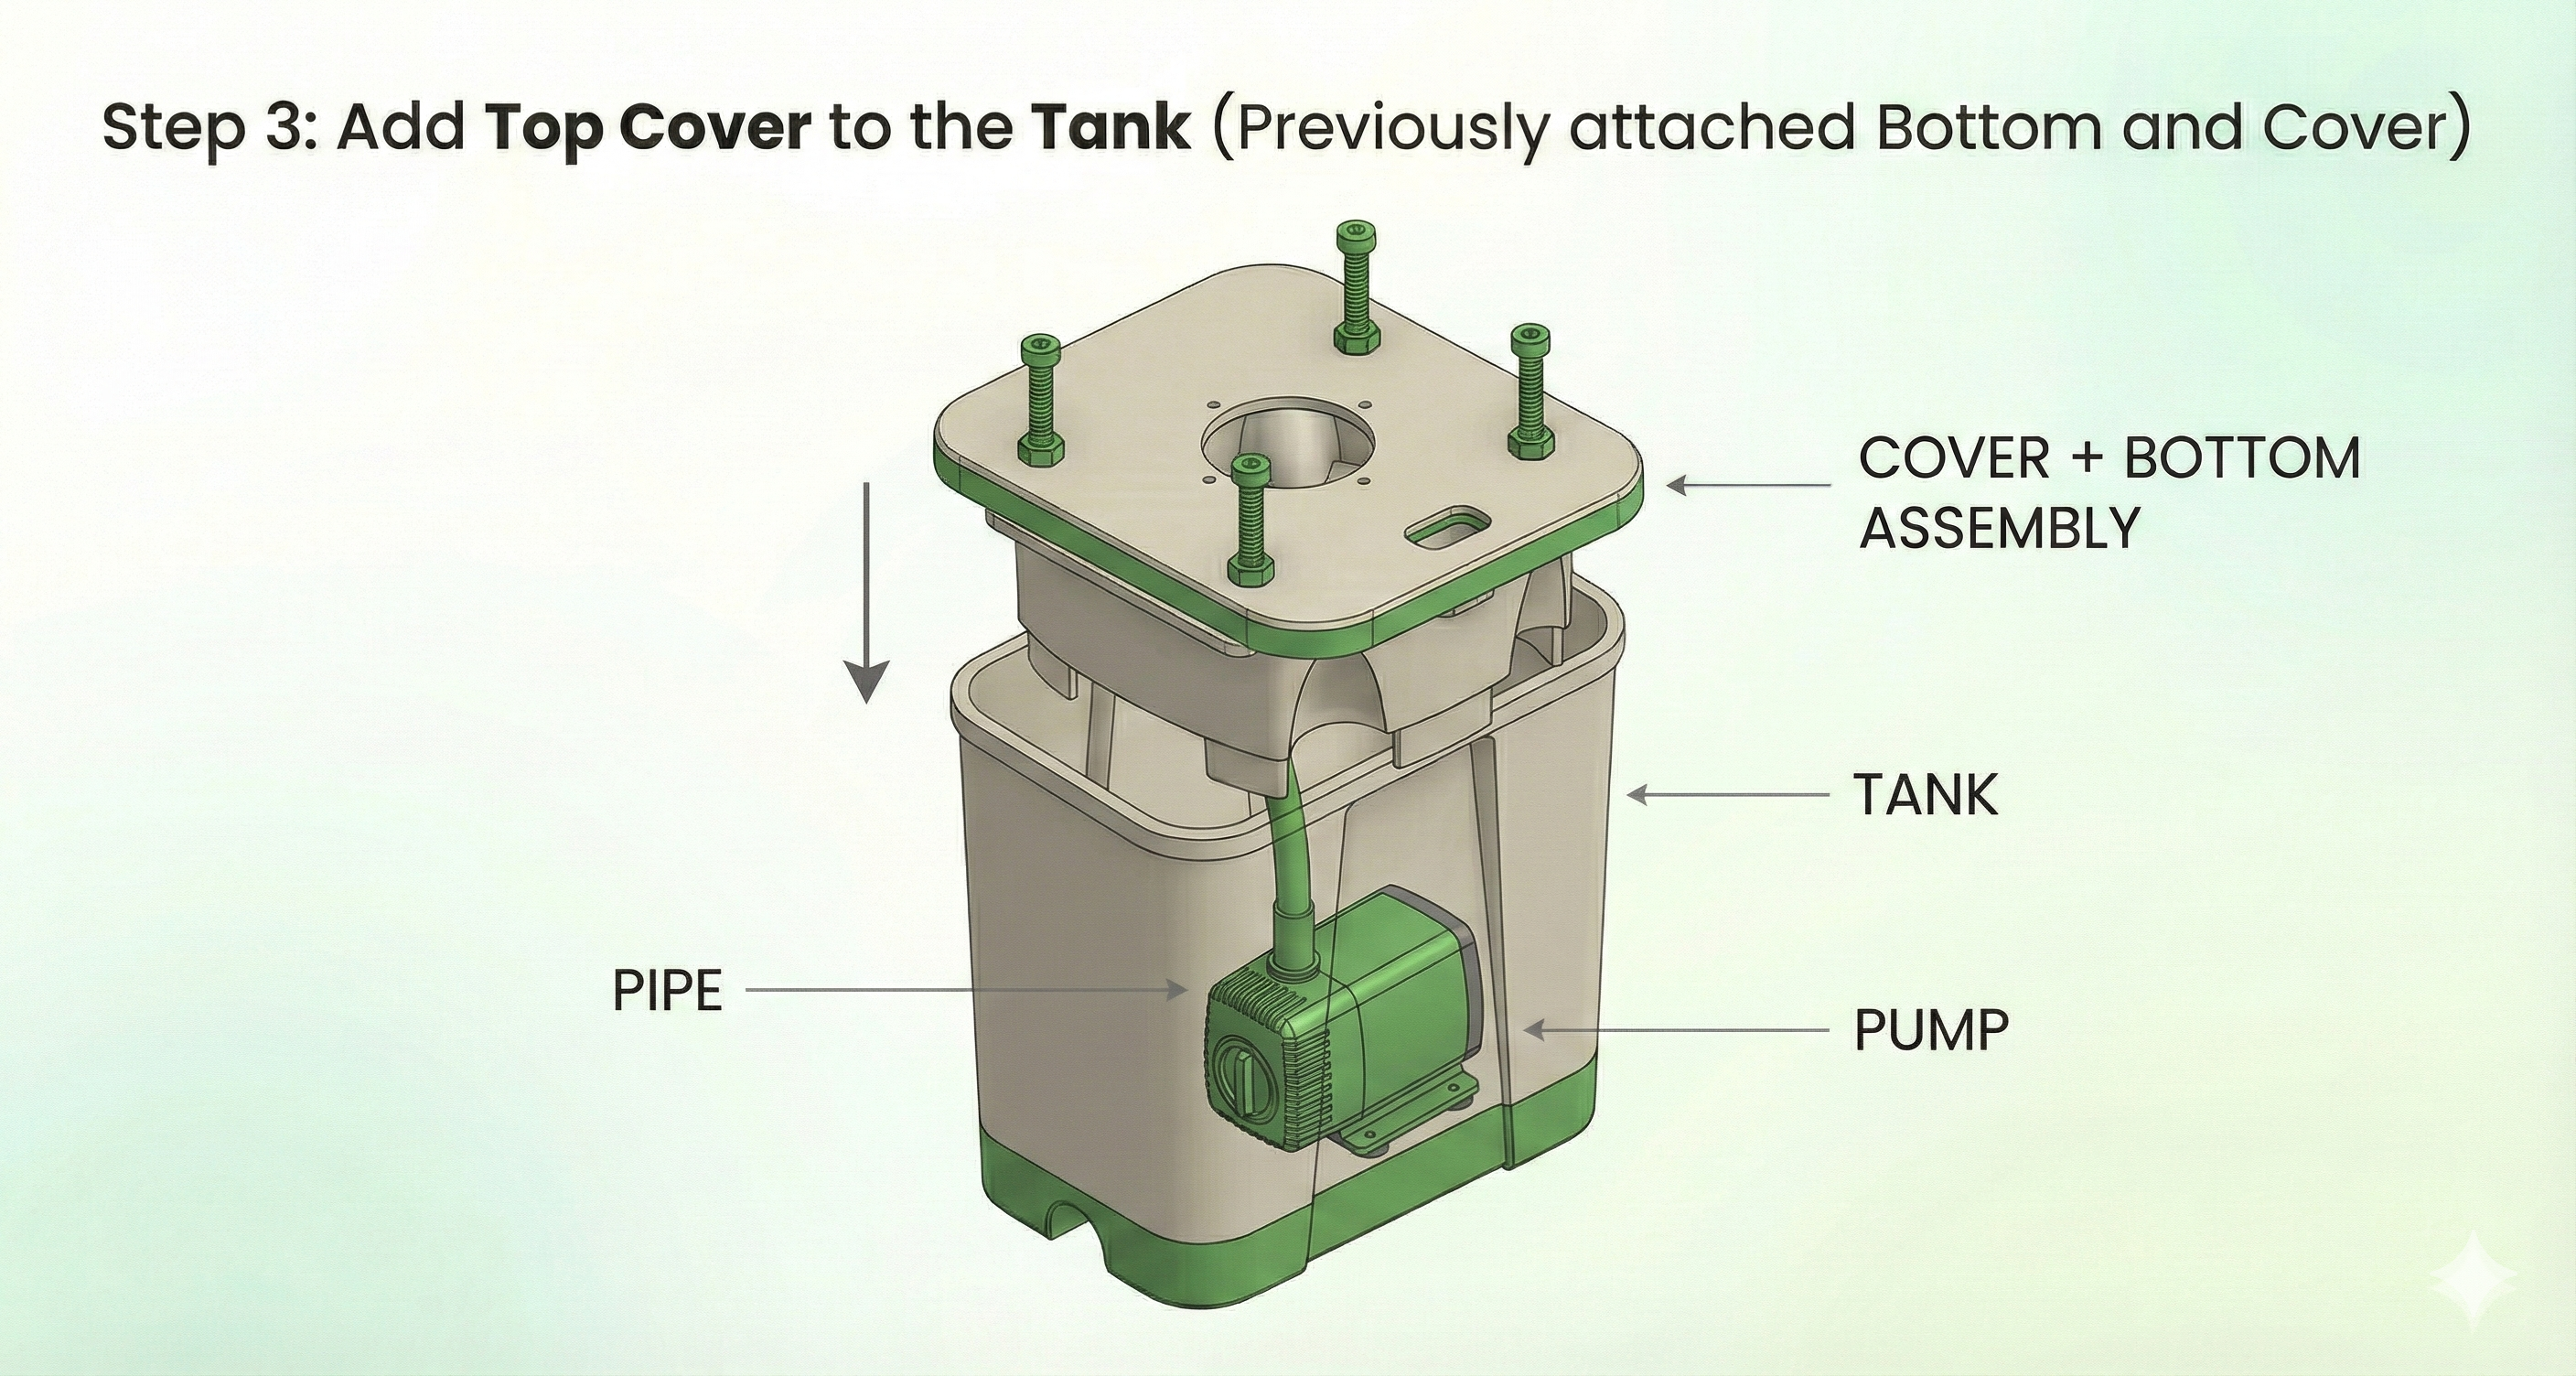
Install pump in the tank

Place the pump at the bottom of the empty tank and connect the pipe to the pump outlet using the connector. Make sure the cable exits neatly through the notch in the tank cover area.

Pump placed inside the tank with pipe and connector attached.
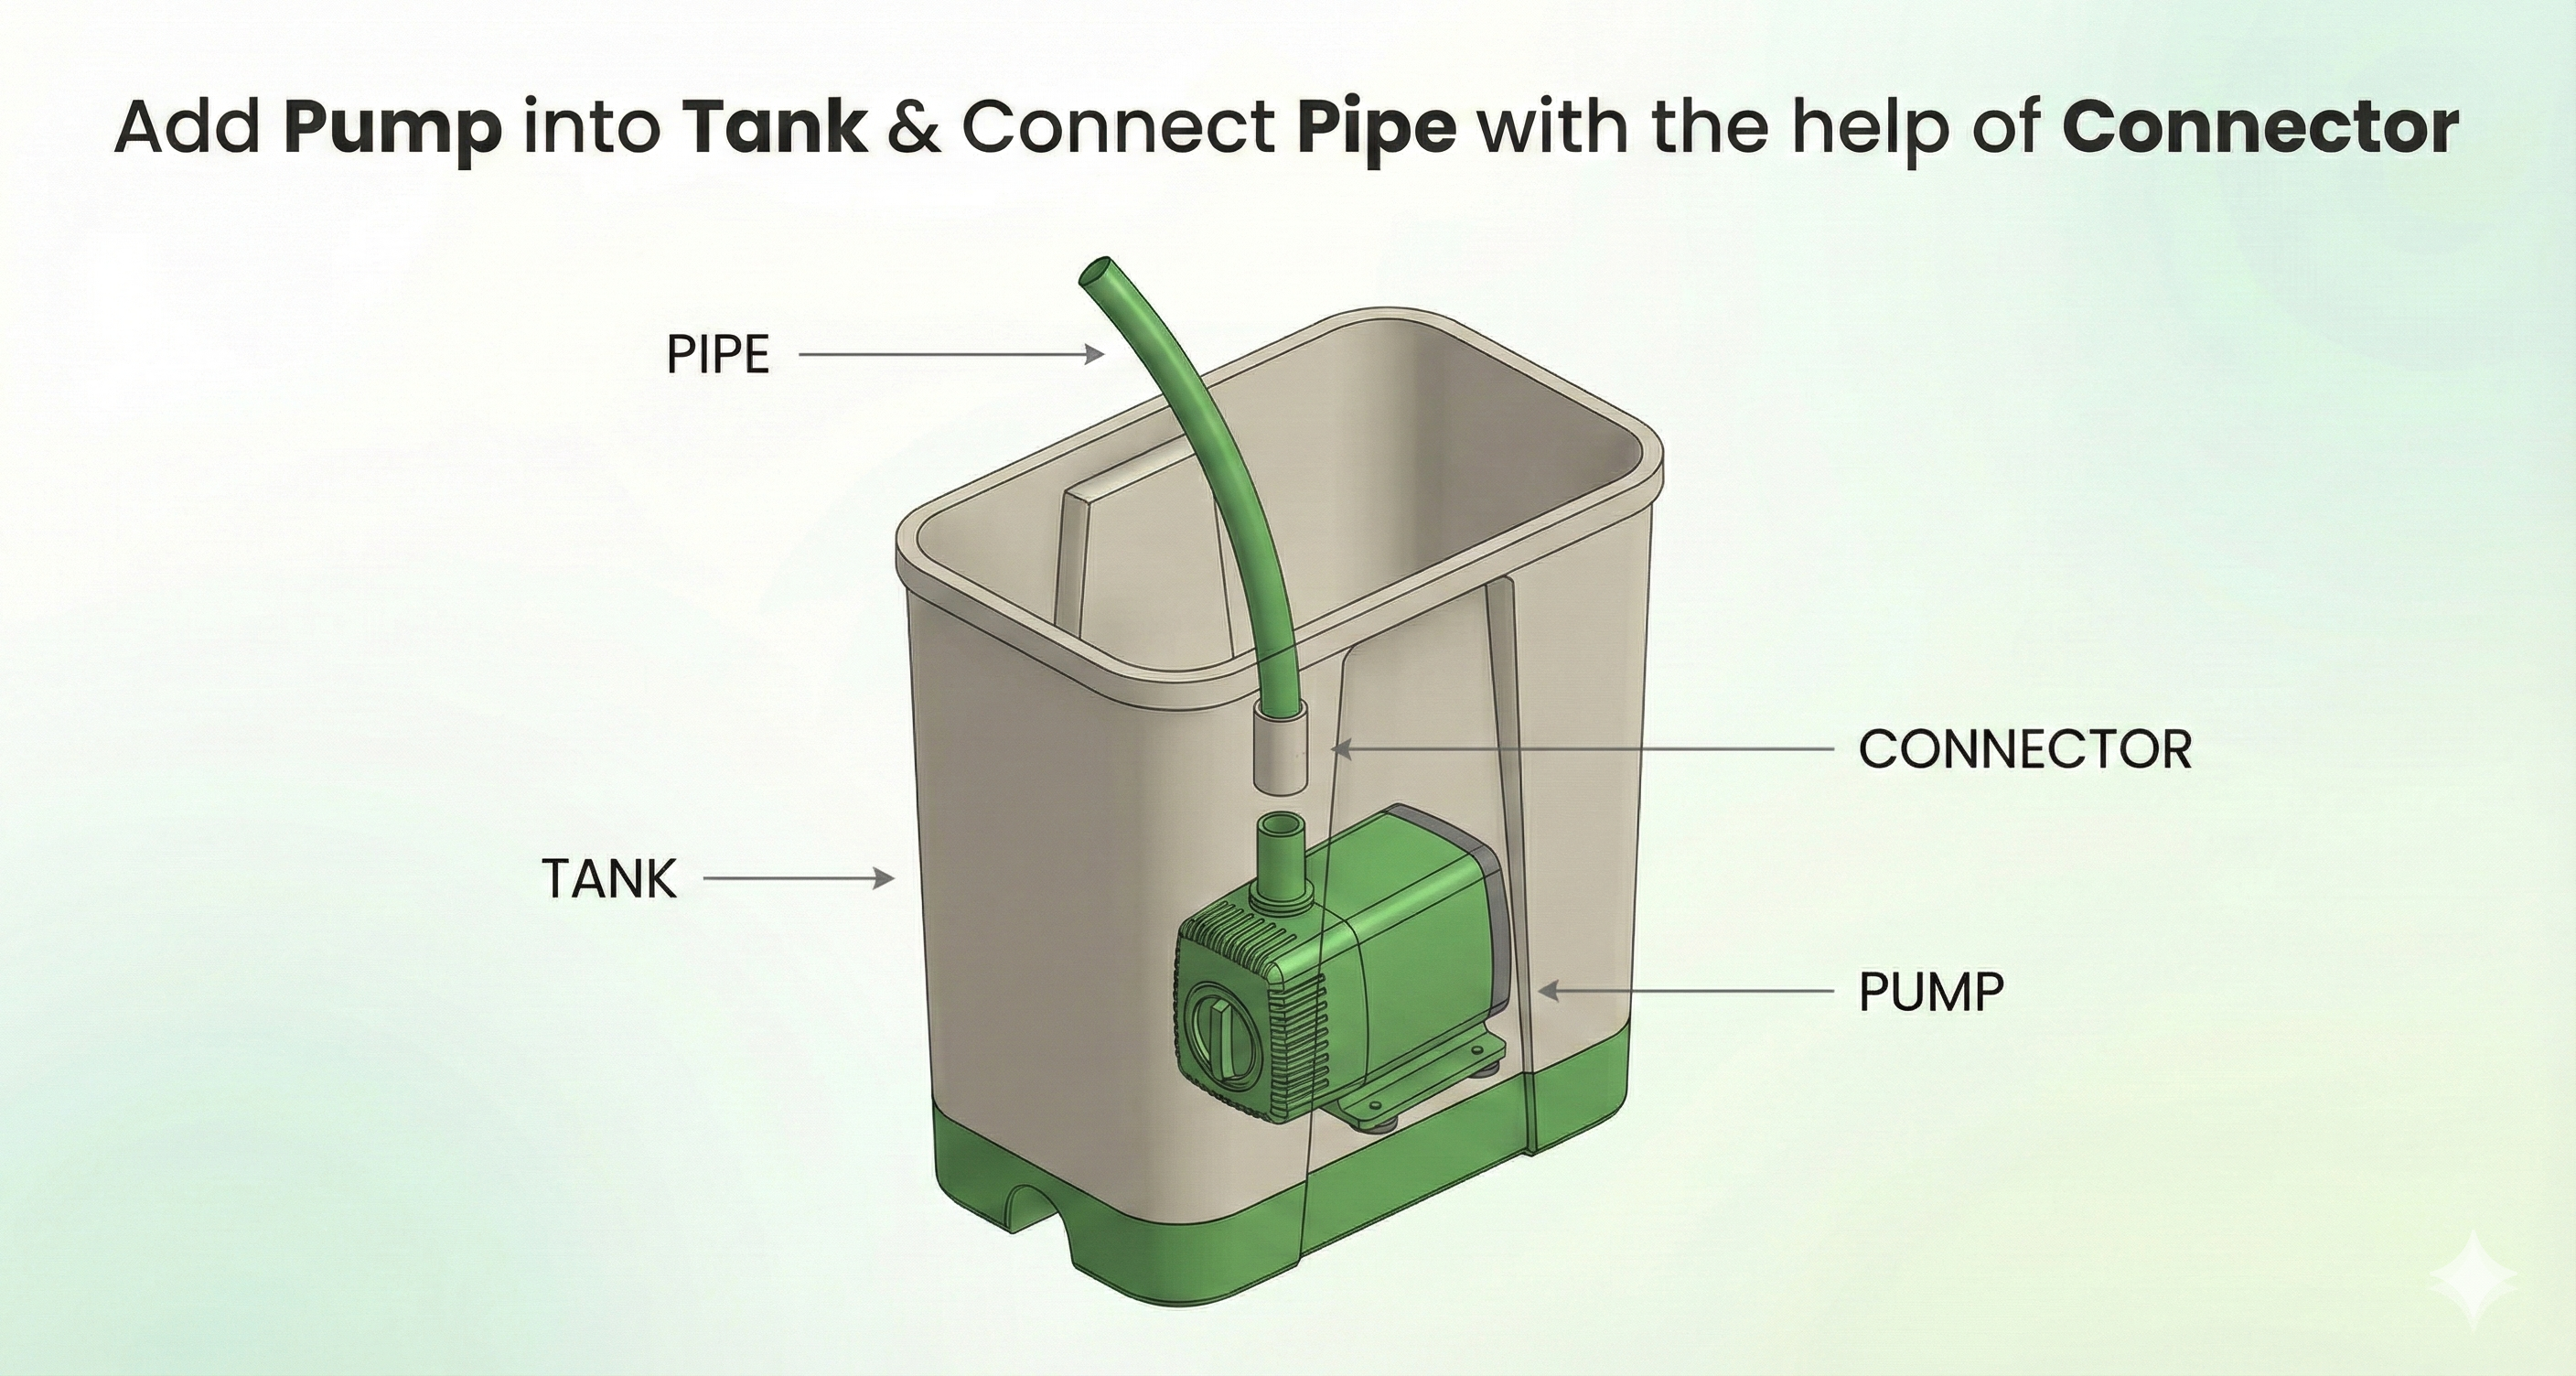
Pump and pipe inside the tank.
2
Attach base to tank cover

Fix the bottom/base section to the tank cover using the supplied screws and nuts. Tighten all screws evenly so the base sits flat and supports the tower weight.

Base section being screwed to the tank cover.
Base locked to tank cover.
3
Mount cover on tank

Place the tank cover with base onto the tank, guiding the pipe up through the centre opening. Check that the pump cable and pipe are not pinched and the cover rests securely on the tank rim.

Tank cover and base seated on top of the tank with pipe in the centre.
Tank, pump and cover assembled.
4
Stack tower sections & pipe

Add the tower sections one by one on the base, aligning slots and locking them in place. At the same time, extend the central pipe upwards using the connector so it reaches close to the top.

Tower sections being stacked with central pipe running through the middle.
Sections stacked around the central pipe.
5
Add crown & net pots

Place the crown on the top section to close the tower and ensure the pipe is seated correctly. Finally, insert all net pots into the planting slots and your Happhygreenz NeoX tower is ready to fill and plant.

Completed tower with crown fitted and net pots in all planting slots.
Finished tower ready for nutrients and seedlings.

Watch the Tower Assembly Video